Watch out, the software geek is spinning servos. I made my first robot yesterday. My emphasis was on not destroying any of the parts i was using, so they could be reused in future projects. First, a shot of how messy my work area out in the garage was during building:
As you can see, I've really got to spend some time getting stuff organized.
The bot is built on a sheet of yellow plastic that's fairly strong yet easy to cut with some grunty swipes of the utility knife. It uses a single power source connected directly to Vin on the arduino. The battery pack is mounted on the underbelly (6aa NiMH rechargeables). The arduino and mini breadboard are mounted on top. For locomotion, i have 2 gws continuous servos connected to the regulated 5v output of the arduino. I have a switch on the breadboard controlling the servos, so I can start and stop them independently to the arduino. For wheels, I use leftover CDs that i drilled holes in and mounted to the servo horns using wire. For a 3rd wheel, I used one of the slippery pad things intended to go on the bottom of chair legs to help it slide. With the batteries, it weighs 1lb, 2oz. It's programming is dead simple, I basically just turn on both wheels and roll. I did break out the wheel functions to a separate file (not a library, just crammed in a .h) to aid in reusing in my next bot. I think I have a power thing I don't understand with this one (alert:software geek doesn't know which end of a capacitor is up). I have loop() do a serial.print() each time it gets called, and that print stops happening when the wheels start. I'll be damned if i can can find meaningful data on the servos to tell me what their peak power draw is, so it perplexes me. It will perplex me less when my motor driver arduino shield arrives, because i think that will help. I also need to start driving the motors from a different power supply than the arduino. I'm imagining my next bot sagging under the weight of all these batteries.
It scoots around the kitchen floor, it is rather cute. I did learn a lot by building it. Here it is ready to roll:
Showing posts with label arduino. Show all posts
Tuesday, December 21, 2010
Saturday, December 11, 2010
LOL shield Hello World and Blogger's icky video
So I used Blogger's built in video uploading, and wow, did it #FAIL. There seemed to be something gefunct with the video playback, the frames only advanced when I wiggled the mouse (Win 7 Home Premium). So, this is a test to see if posting from youtube directly works better.
Fingers crossed as i hit Post.
Software Geek learning to solder
I wanted to pick a project with lots of soldering, so I could learn how to do it, and work on my technique. Full disclosure: I have actually soldered before while making stained glass panels, but it is quite different than this. For electronics soldering, it's very precise, and uses smaller amounts of solder and a tiny little tip on the iron.
I picked the LOL shield as my learn to solder project. 126 LEDs all soldered in very close proximity to each other. Here is the underside of the board part way thru the soldering process.
I took my time, and actually spread the soldering work across several sessions. Basically you stick each row in, flip over the board, and solder *one* lead on each LED. Then you flip it right side up, and reheat each joint, straightening the LED while it is molten. Then you solder the remaining leads, and clip them off. I guess the biggest mistake I kept making in the beginning was that I wasn't heating the joint properly before applying solder. One thing I still haven't figure out is desoldering when one of the holes gets filled with solder. When it is wedged in an open hole, even with reheating, i couldn't seem to get the solder sucker to completely remove it, and my desoldering braid seemed completely ineffective.
Like most arduino things, there were excellent instructions on how to do this online.
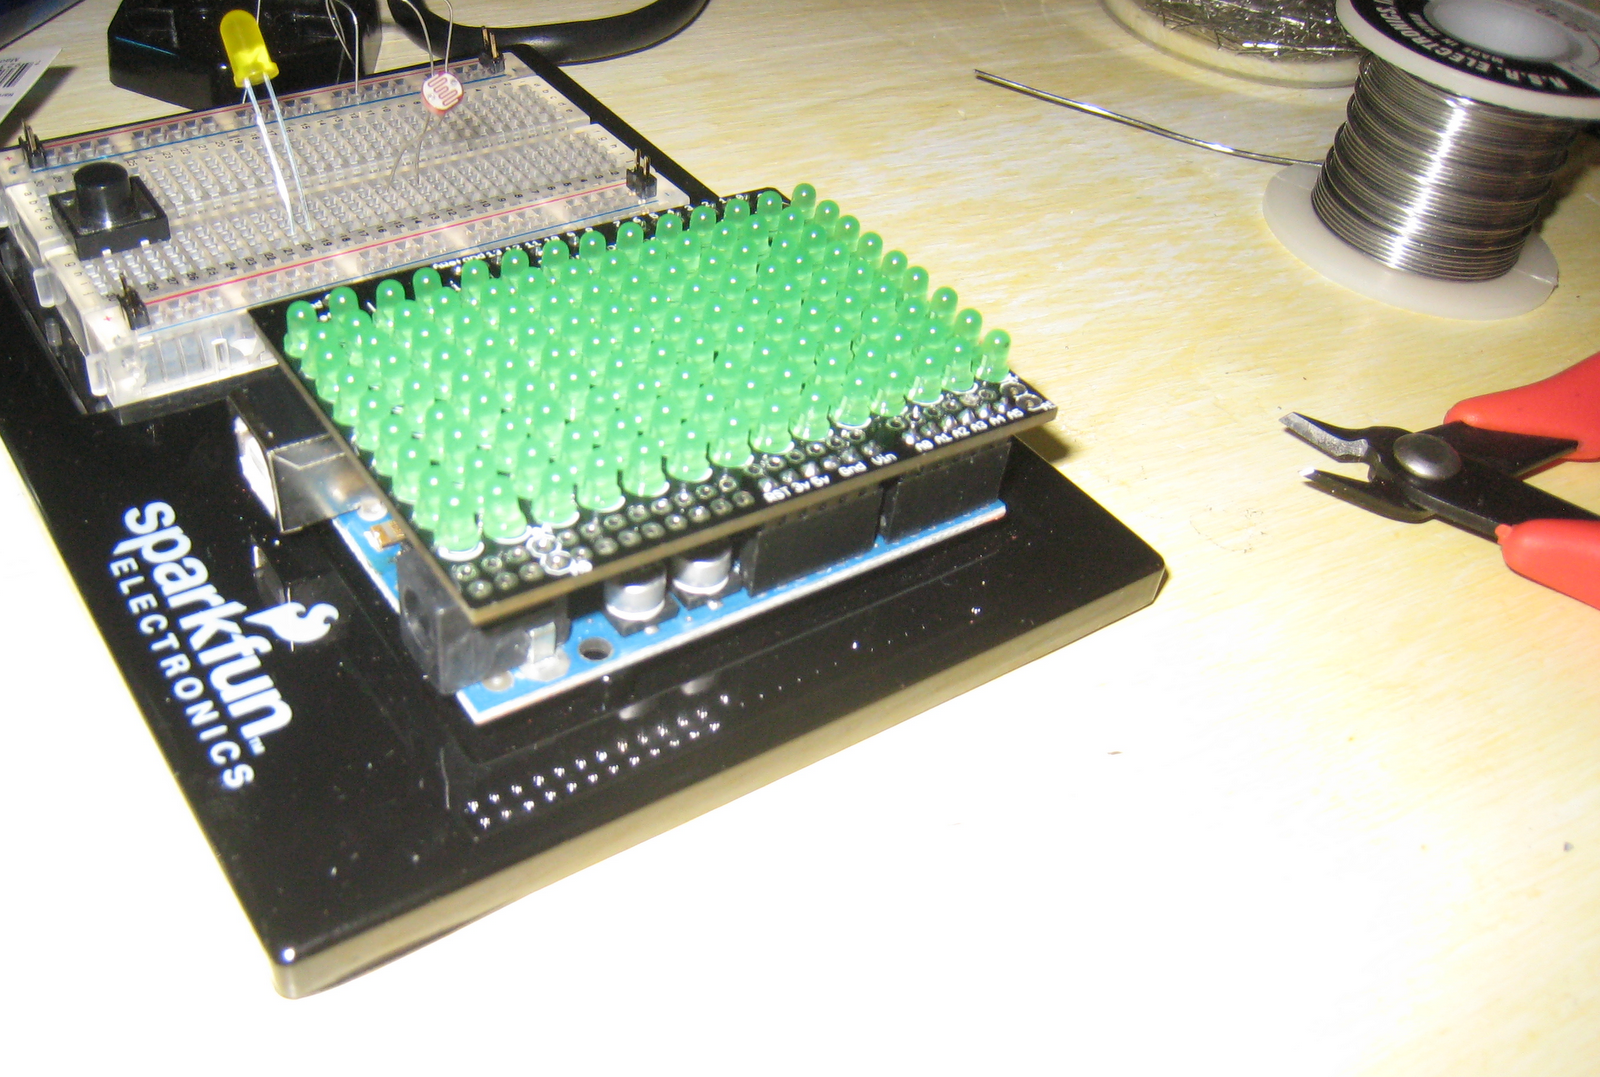
Here's a pic of the completed shield, mounted on my arduino uno:
Once I had it mounted, I grabbed the open source library from svn to use it, and tried out the samples. You have control over each LED, and they have a built in font library.
I picked the LOL shield as my learn to solder project. 126 LEDs all soldered in very close proximity to each other. Here is the underside of the board part way thru the soldering process.
I took my time, and actually spread the soldering work across several sessions. Basically you stick each row in, flip over the board, and solder *one* lead on each LED. Then you flip it right side up, and reheat each joint, straightening the LED while it is molten. Then you solder the remaining leads, and clip them off. I guess the biggest mistake I kept making in the beginning was that I wasn't heating the joint properly before applying solder. One thing I still haven't figure out is desoldering when one of the holes gets filled with solder. When it is wedged in an open hole, even with reheating, i couldn't seem to get the solder sucker to completely remove it, and my desoldering braid seemed completely ineffective.
Like most arduino things, there were excellent instructions on how to do this online.
Here's a pic of the completed shield, mounted on my arduino uno:
Once I had it mounted, I grabbed the open source library from svn to use it, and tried out the samples. You have control over each LED, and they have a built in font library.
Sunday, November 14, 2010
Third hand
This is a pic of me wiring up one of the beginning examples in the arduino starter kit. It's one that fires up a small DC motor. A couple of things to note.... The wiring diagram pinned on the breadboard makes it idiot proof to wire up. I hope i'm learning enough to wire up things without them.
Also note i got a "third hand" contraption. It's meant to hold your PCB while you solder with little alligator clips, it even has an soldering iron holder. Right now i'm using it to get a better view of things on the breadboard and to help sort tiny little resistors and such. (read: my eyes are old). It even has a nice LED light built in.
Thursday, November 11, 2010
On my command.... Shields up!
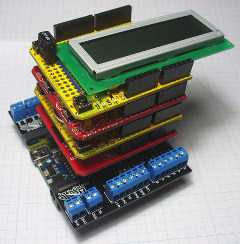
Arduino is a whole parallel universe, and a cottage industry has sprung up around making hardware extensions called shields. Shields make arduino very configurable for whatever the particular project at hand. They connect, one on top of the other like the photo from shieldlist.org below. I imagine several shields are in my future, one of the battery shields for sure.
Tuesday, November 9, 2010
Choice is good
I recently got excited and interested in doing some robotics in my not so spare time. For some reason it has just grabbed me.
So I started investigating, and I've been shocked (overwhelmed?) by all the choices. I considered the non-vacuum version of the roomba called the create, with a netbook globbed on top of it. So then my friend Kurt started talking to me about the cool little beagle board and the new sweet dual core panda board.
The panda board looked really nice, but I decided I didn't really want to spend my time tinkering under the operating system, and pandaboard just smelled like an operating system project.
Then I stumbled across arduino. It's a small, cheap, simple micro controller for robotics projects. I've ordered one from sparkfun. Hurry up fedex man, hurry up.
So I started investigating, and I've been shocked (overwhelmed?) by all the choices. I considered the non-vacuum version of the roomba called the create, with a netbook globbed on top of it. So then my friend Kurt started talking to me about the cool little beagle board and the new sweet dual core panda board.
The panda board looked really nice, but I decided I didn't really want to spend my time tinkering under the operating system, and pandaboard just smelled like an operating system project.
Then I stumbled across arduino. It's a small, cheap, simple micro controller for robotics projects. I've ordered one from sparkfun. Hurry up fedex man, hurry up.
Subscribe to:
Posts (Atom)